Software Calibration for Mini Pupper 2 and 2Pro
1. Calibration Setup
Tools
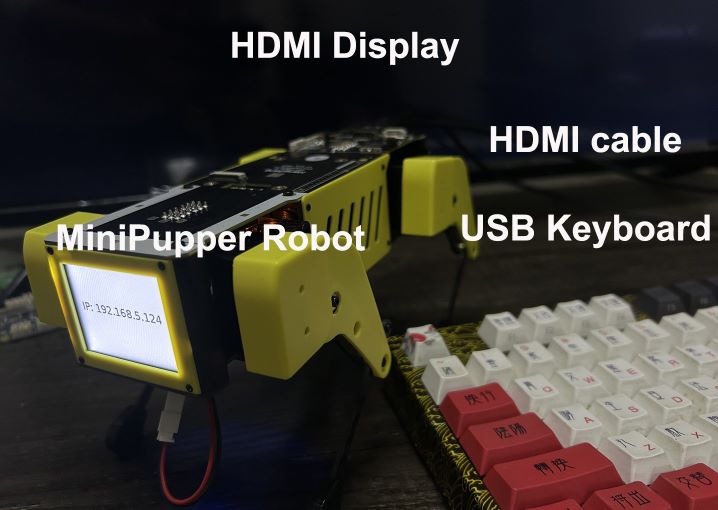
For beginners, in addition to the tools included in the kit, the following items are required.
USB keyboard
HDMI display
micro HDMI cable for connection between display and carry board
For beyond, you can use your PC to ssh to Mini Pupper to do everything, please refer to step 1.4
Step 1.1 Startup
Connect the carry board to the display with a microHDMI cable.
Connect a USB keyboard to the carry board.
Press and hold the battery button of the Mini Pupper for three seconds to boot up.
If you can see Ubuntu running on your screen, you have succeeded. You should also see the IP address or “IP: no IPv4 address” on Mini Pupper display.
Step 1.2 Log in
Press ubuntu button on the screen to log in.
Default username: ubuntu
Default password: mangdang
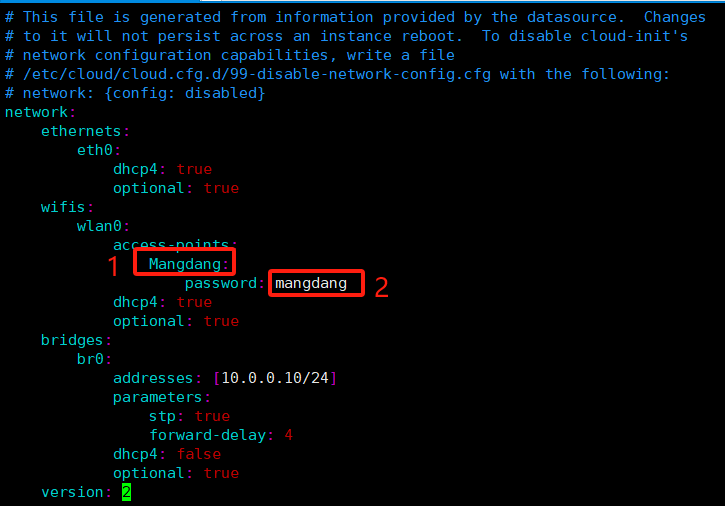
Step 1.3 Set your own WiFi
Edit the WiFi configure file(50-cloud-init.yaml), and set your WiFi to your own.
sudo vi /etc/netplan/50-cloud-init.yaml
# Edit and save
sudo netplan apply
sudo reboot
You can also refer to mini_pupper_web_controller
Step 1.4 Open ports for ssh without HDMI display
Use your phone to set the default WiFi used by Mini Pupper.
WiFi name: Mangdang
Password: mangdang
Power on your robot and check the LCD display
If the LCD shows “IP: no IPv4 address”, then reboot your robot again.
After the LCD shows the IP address, make an ssh connection from your PC to your robot.
ssh ubuntu@192.168.x.x
If you are unable to make an ssh connection from your PC, you will need to configure the following, maybe.
sudo ufw allow 22
sudo ufw reload
If firewall is not running, do the following.
sudo ufw enable
2. Calibration
Step 2.1 Leg calibration
Please refer to the below calibration video clip.
Then assemble the 4 legs by hand at the right position as the below picture shows.
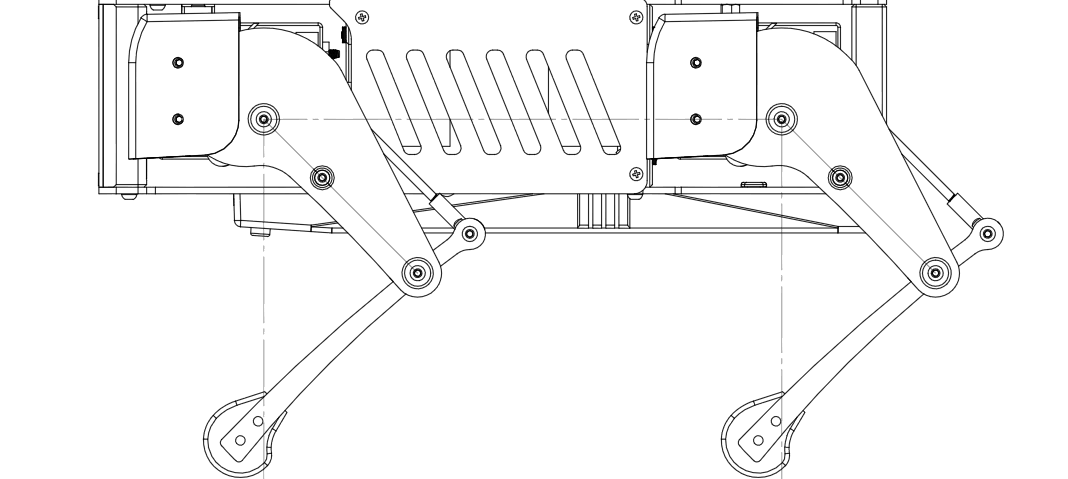
It is a little bit difficult to measure the accurate inclination of the legs, so it is better to place the legs on a grid, like a piece of graph paper, to check that they are in the same position from front to back and from side to side, and to make any final adjustments.
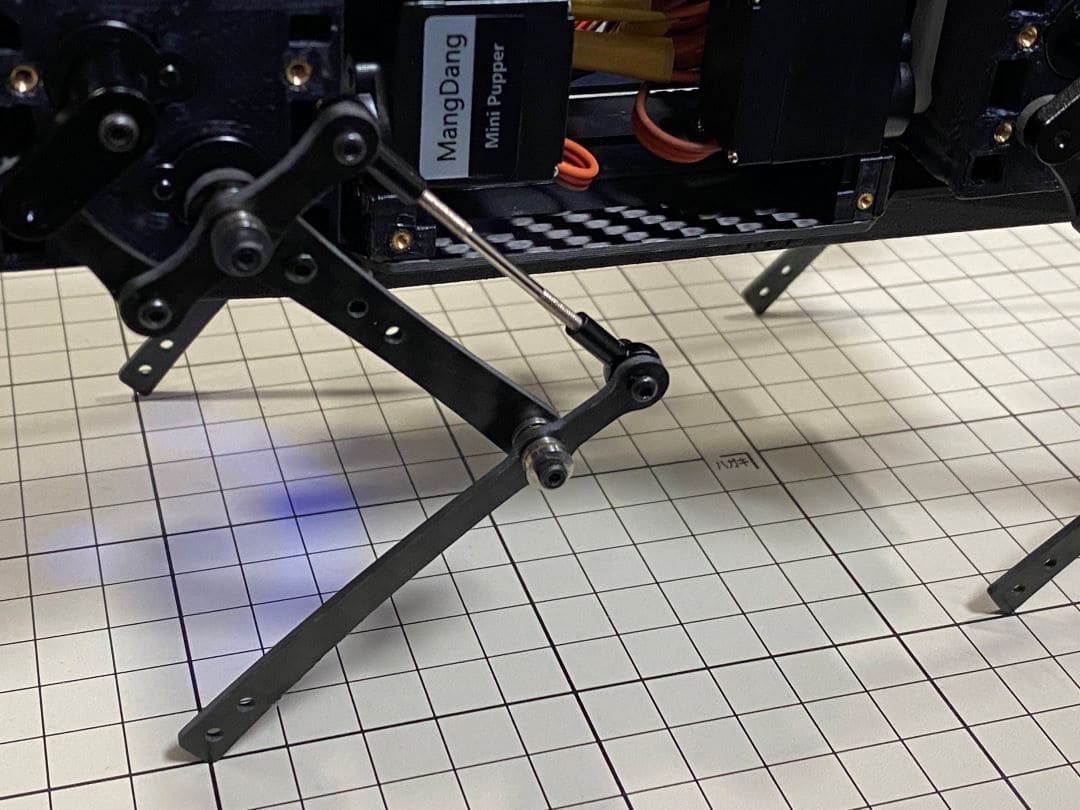
When all legs are at 45° inclination as shown, press “s” to save the settings. Press “q” to quite the calibration application.
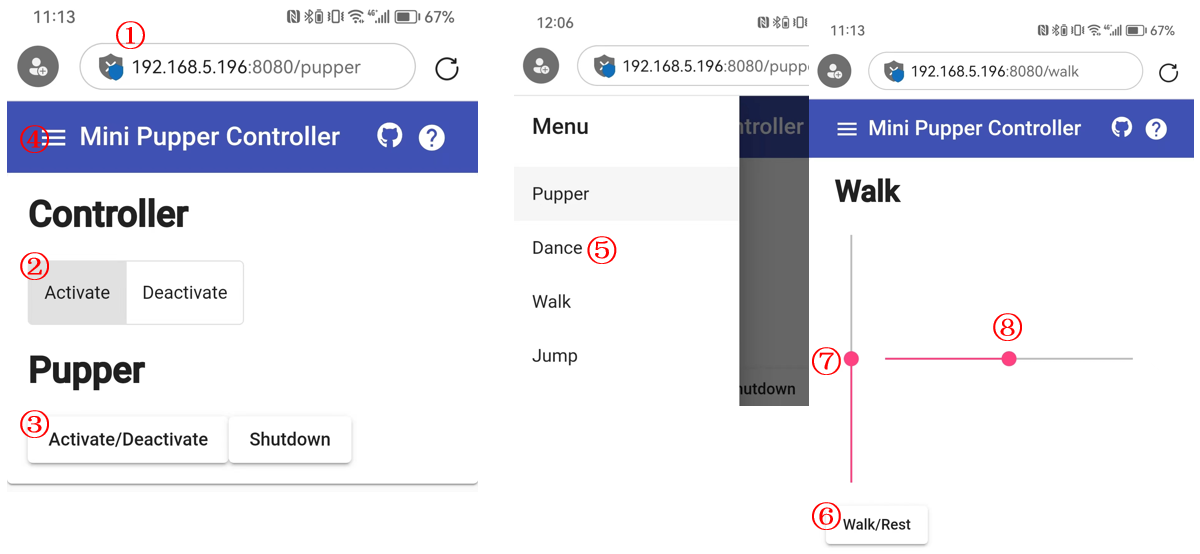
Step 2.2 Use a web browser to run
Point a web browser to http://x.x.x.x:8080 where x.x.x.x is the IP address of your mini_pupper, such as, http://192.168.5.196:8080
Click the “Activate” button of the “Controller” tab.
Click the “Activate/Deactivate” button of the “Pupper” tab.
Click the “≡” icon at the top left corner.
Choose the “Walk” option.
Click the “Walk/Rest” button.
Use the scroll bar to control your Mini Pupper